
Welcome to the comprehensive guide on Danco instructions! Danco is a trusted brand offering a wide range of plumbing solutions, including faucet parts, trim kits, and spouts․ Their products are designed for easy installation, ensuring a seamless DIY experience․ With clear, step-by-step instructions, Danco empowers homeowners to tackle plumbing projects confidently․ This guide will walk you through the essential steps, tools, and safety tips for a successful installation․
1․1 Importance of Following Danco Instructions
Adhering to Danco instructions is crucial for ensuring safe, efficient, and correct installations․ Properly following the guidelines minimizes the risk of water leaks, electrical hazards, and product damage․ Danco’s detailed instructions are designed to simplify the process, making it accessible for both professionals and DIY enthusiasts․ By following the steps, you ensure compliance with safety standards and warranty requirements․ Neglecting the instructions can lead to improper installations, voiding warranties or causing costly repairs․ Always prioritize safety by turning off water and power supplies before starting․ Using the recommended tools and materials guarantees optimal performance and longevity of Danco products․ This careful approach ensures a successful and stress-free installation experience every time․

General Installation Guidelines
Before starting, ensure all necessary tools and materials are ready․ Turn off water and power supplies․ Follow Danco’s step-by-step guides for a smooth process․ Use recommended tools to avoid damage and ensure proper fitting․ Always check compatibility of parts with your specific fixture․ Proper preparation prevents leaks and ensures longevity of the product․ Danco’s instructions are designed to make installations straightforward, whether you’re a professional or a DIY enthusiast․ Safety and precision are key to a successful installation experience․
2․1 Tools and Materials Required for Danco Installations
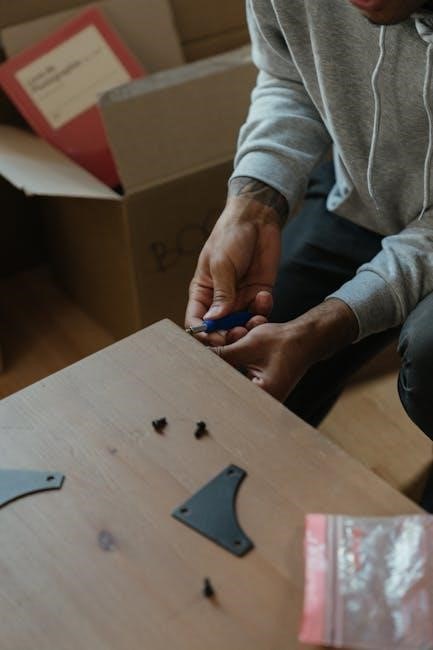
For a successful Danco installation, gather the necessary tools and materials beforehand․ Common tools include a small slotted screwdriver, Phillips screwdriver, adjustable wrench, pliers, and a bucket to catch water․ Materials like Teflon tape, plumber’s putty, and replacement gaskets are often required․ Depending on the product, additional items such as mounting hardware or sealants may be needed․ Always refer to the specific Danco product guide for a detailed list of requirements․ Having everything prepared ensures a smooth and efficient installation process․ Proper tools and materials prevent leaks and ensure a secure fit․ Danco’s instructions are designed to be clear, but being well-prepared minimizes delays and potential issues․
2․2 Step-by-Step Installation Process Overview
The installation process begins with turning off the water supply to prevent leaks․ Next, disassemble the existing fixture by removing handles, spouts, or other components using a screwdriver or wrench․ Clean the area to ensure a proper fit․ For faucet installations, install the new stem assembly using the provided tool․ For tub/shower trims, align the kit with the existing valve and secure it․ Apply plumber’s putty or Teflon tape where needed․ Reassemble components in reverse order, tightening securely but avoiding over-tightening․ Finally, turn the water supply back on and test for leaks․ Danco’s instructions provide clear guidance, but following this general process ensures a smooth and efficient installation․ Always double-check connections for a leak-free result․

Product-Specific Installation Instructions
Danco provides detailed instructions for various products, including faucet parts, tub/shower trim kits, and spouts․ Each guide offers tailored steps for seamless installation, ensuring optimal performance and longevity․
3․1 Faucet Parts and Accessories Installation
Installing Danco faucet parts and accessories is a straightforward process when following the provided instructions․ Start by gathering the necessary tools, such as a small slotted screwdriver and Phillips screwdriver․ Carefully remove any old or damaged faucet components, ensuring the area is clean and dry․ Next, install the new stem assembly using the supplied stem tool, making sure it is securely fastened․ Replace any worn-out O-rings or gaskets to prevent leaks․ For aerators, simply thread them onto the faucet spout and tighten by hand or with a wrench․ Refer to Danco’s 3D BILT instructions for visual guidance․ Double-check all connections and test the faucet to ensure proper function․ Proper installation ensures longevity and optimal performance of your faucet․
3․2 Tub/Shower Trim Kit Installation
Installing a Danco Tub/Shower Trim Kit is a great way to modernize your bathroom․ Begin by turning off the water supply and disassembling the old trim․ Remove any old handles, spindles, or escutcheon plates․ Next, clean the area around the shower valve to ensure a proper fit․ Install the new trim kit by aligning the base plate with the valve stem and securing it with screws․ Use a wrench to tighten firmly․ Replace the handle and test the operation․ For precise alignment, Danco recommends using BILT 3D interactive instructions․ Ensure all connections are secure to avoid leaks․ Proper installation enhances both functionality and aesthetics, giving your bathroom a fresh, updated look․
3;3 Spout and aerator Installation
3․3 Spout and Aerator Installation
Installing a Danco spout and aerator is a straightforward process that enhances water flow efficiency․ Begin by turning off the water supply and disconnecting the old spout․ Use an adjustable wrench to remove any existing spout or aerator․ Clean the faucet’s threaded area to ensure a secure fit․ Install the new spout by threading it onto the faucet body and tightening with a wrench․ For the aerator, assemble the parts according to the instructions and screw it onto the spout․ Ensure all connections are tight to prevent leaks․ Danco recommends using Teflon tape for added security․ Finally, turn on the water supply and test the faucet to ensure proper function․ This installation improves water flow and reduces splashing, making it a practical upgrade for any kitchen or bathroom faucet․

Safety Precautions and Warnings
Always turn off the water supply before starting any installation to prevent water damage or electrical hazards․ Avoid over-tightening components to prevent damage․ Follow Danco’s guidelines carefully․
4․1 General Safety Tips for Plumbing Installations
Before starting any plumbing project, ensure the water supply is turned off to prevent accidental leaks or water damage․ Always unplug electrical appliances near the work area to avoid shocks․ Use proper tools and avoid over-tightening to prevent damage to components․ Protect surrounding surfaces with towels or buckets to catch potential drips․ Wear safety goggles and gloves for protection․ Follow manufacturer guidelines and local plumbing codes strictly․ Never proceed without a clear understanding of the steps involved․ If unsure, consult a professional․ Regularly inspect connections for leaks after installation․ Keep a bucket and mop handy for unexpected spills․ Proper preparation and caution ensure a safe and successful installation process․
4․2 Specific Safety Instructions for Danco Products
When working with Danco products, always disconnect the water supply before starting any installation to prevent water damage or flooding․ Avoid over-tightening components, as this may damage threads or gaskets․ Use only genuine Danco replacement parts to ensure compatibility and safety․ Follow the provided installation manual carefully, as improper steps can lead to leaks or malfunctions․ Wear protective gloves and goggles to shield yourself from sharp edges or debris․ Keep the work area well-ventilated, especially when using adhesives or sealants․ Never apply excessive force, as this could strip threads or crack components․ If unsure about any step, refer to Danco’s official guidelines or consult a professional․ Adhering to these instructions ensures a safe and successful installation experience․
Troubleshooting Common Issues
Identify leaks by inspecting connections and gaskets․ Tighten loose parts without over-tightening․ Replace worn-out Danco components․ Consult Danco’s troubleshooting guide for specific solutions․ Address issues promptly․
5․1 Diagnosing and Fixing Leaks
Leak detection is crucial for maintaining your plumbing system․ Start by turning off the water supply and inspecting the faucet or spout for visible water droplets․ Common leak sources include worn-out gaskets, O-rings, or loose connections․ Use a small slotted screwdriver to disassemble the faucet and locate the faulty part․ Replace damaged components with genuine Danco replacements to ensure reliability․ Reassemble carefully, ensuring all connections are tight but not over-tightened․ Test the repair by turning the water supply back on and checking for leaks․ For persistent issues, consult Danco’s troubleshooting guide or contact their support team for assistance․ Always follow Danco’s instructions to prevent further damage․
5․2 Resolving Installation-Related Problems
Installation issues can arise due to loose connections, misaligned parts, or incorrect tool usage․ Start by reviewing Danco’s installation instructions to ensure all steps were followed correctly․ If a part doesn’t fit, check for proper alignment or verify if the correct tools were used․ Loose connections can often be resolved by tightening fittings gently but firmly․ For misaligned components, disassemble and reposition according to the guide․ If issues persist, consult Danco’s troubleshooting resources or contact their customer support for assistance․ Keep all original packaging and receipts handy for potential warranty claims․ Remember, patience and attention to detail are key to resolving installation-related problems effectively․
With these steps, you’ve completed the Danco installation guide! By following the instructions carefully, you’ve ensured a professional finish and reliable performance․ Danco’s commitment to quality and ease of use makes DIY plumbing accessible to all․ For future projects, refer back to these instructions and explore Danco’s product line for more solutions․ Happy renovating!
6․1 Final Tips for Successful Danco Product Installation
For a flawless Danco installation, always start by turning off the water supply to prevent leaks․ Use the correct tools as specified in the instructions to avoid damaging components․ Follow each step methodically, ensuring all connections are secure and aligned properly․ Double-check your work before finalizing to catch any potential issues early․ If unsure, consult Danco’s customer support or online resources for additional guidance․ Properly dispose of packaging and old parts responsibly․ Regular maintenance will extend the life of your Danco products․ Remember, patience and attention to detail are key to a successful DIY project․ Happy fixing!